NEW BRIDE-FRIENDLY WEBSITE AT CORNERSTONEALBUMS.COM!
 A lot of you had requested a website for CLIENTS ONLY that has the pricing information kept confidential so you can show your clients the awesome new
NEW BRIDE-FRIENDLY WEBSITE AT CORNERSTONEALBUMS.COM!
 A lot of you had requested a website for CLIENTS ONLY that has the pricing information kept confidential so you can show your clients the awesome new
INSTANT MOVIES ONLINE IS NOW VIRAL!
 I call it the Viral Uphill Spiral (I may be a poet who didn’t even noet). When you create an InstantMovieOnline – we now have put in a link that allows the viewer to email a friend… so imagine this –
You shoot a gig. You pop in your CF card and INSTANTLY create a webmovie set to music in minutes. You impress the heck out of your client by giving them an instant slideshow of their images – PLUS you maybe even create a little gallery on your website of “recent events”… OK so now people view the slideshow, and forward it to a friend – who forwards it to their friends, who forward it to their friends and so on and so on! And also guess what, there is a link right on the movie that says, “Visit our Website”.
I can’t think of a better, faster, cheaper way to market your photography. Check us out at instantmoviesonline.com
RECOMMENDED SETTINGS FOR THE FUJI S3 AFTER PRINT TESTING

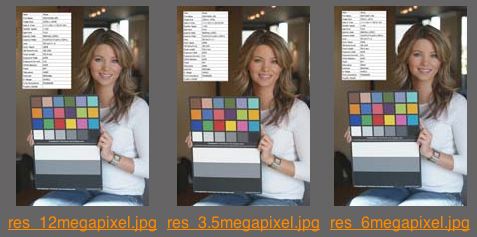
For those of you who shoot Fuji S3′s, I did an extensive test of the camera at all different settings and made 10×15 prints for comparison. These images were shown to the Digital Intensive L.A. workshop students. Everyone was surprised how decent the 1.5 megapixel setting was in output.
After heavy testing in shooting, I have found the best results shooting in sRGB mode (for wet process printers outputting photographic paper) 3.5 megapixel setting (for prints up to 16×20″) -get this – F1 FILM SIMULATION MODE .
In my tests I found that the white balance went warm and the overall “look” of the images went flat when I forced the camera to go to WIDE2 dynamic range. WIDE2 is a recommended setting in extreme situations where blooming is a problem, but because of the flatness and super-warm color cast, I don’t recommend it for everyday shooting. Additionally, WIDE1 was a pretty redundant setting – since AUTO-DR did almost as good a job of holding in blown out highlights as WIDE 2.
When you look through the different settings, pick your favorite. The S3 is a complex camera with WAY more settings than any other camera, and each setting gives a different “look”. See for yourself by clicking HERE
SEVEN WAY DIGICAM COMPARISON
 I took seven of the most popular digital cameras and tested them for Dynamic Range and skin tones. In the dynamic range test, I spotmetered a gray card and came up with a reading of about 180/sec at f5.6 in the face area. Putting the model’s face in the shade and her textured white sweater in the sun (ouch!) I then ran all of the digital cameras within seconds shooting. In this test we are checking for blown-out highlights.
See for yourself the results. The EXIF data is present on the files, so users of Adobe Photoshop can open the files in filebrowser and read the settings that were used. I think this will be of interest.
For the flesh tone test, I had the model hold the gray card AND Macbeth and then neutral balanced the image to the grey card. Once I held the neutrals in, I wanted to see how accurate (or pleasing) the flesh tones would be in windowlight (I shot into an open door) with tungsten in the background…. click here to see the tests!
You can test it for FREE by clicking here and registering. If you want to keep and publish the show, it’s only $19 to publish!
I look forward to your comments.
THIS LENS BABY SPRINGY LENS THINGY!
 This
This
Have you been a little bored lately with your photography? click HERE to order…
TEACH US DIGITAL PHOTOGRAPHY

DIGITAL INTENSIVE 2005 LOS ANGELES DEMI-GRADS

Recent Comments